Prep Time: 25 minutes | Chill Time: 2 hours | Total Time: 2 hours 25 minutes | Yield: 12-16 bars
Imagine sinking your teeth into the classic taste of s’mores, but without the need for a campfire, sticky fingers, or even an oven. Our No-Bake S’mores Dessert Bars with Graham Cracker Crust bring all the beloved elements of this iconic treat into a convenient, sliceable bar that’s perfect for any occasion. This recipe solves the dilemma of wanting that nostalgic, gooey, chocolatey marshmallow goodness without the fuss, making it an ideal choice for busy weeknights, potlucks, or impromptu gatherings.
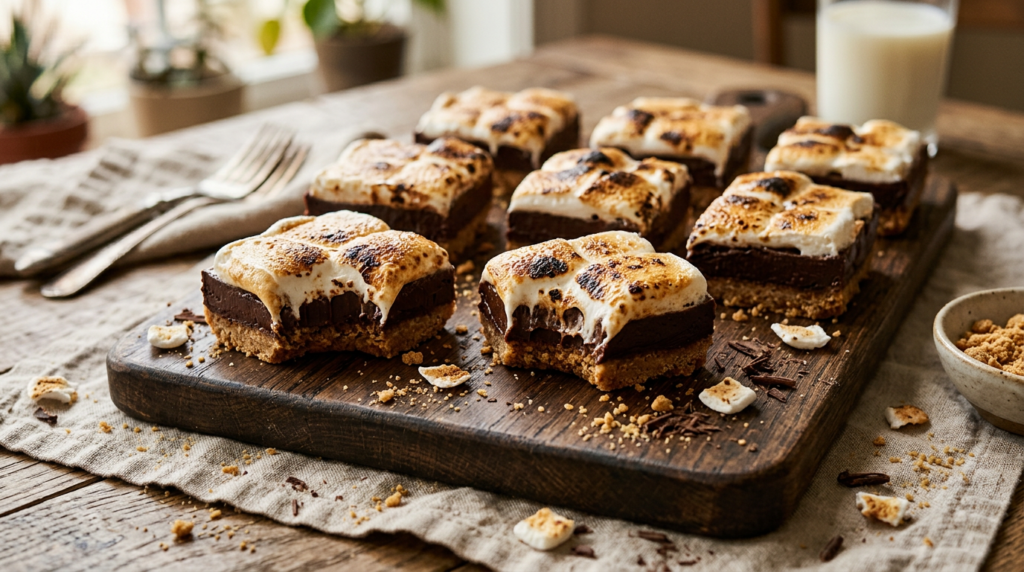
These bars are a symphony of textures and flavors. You’ll start with a sturdy, buttery graham cracker crust that provides a delightful crunch and a hint of honey. Layered on top is a rich, smooth chocolate ganache-like filling that melts in your mouth, offering that deep, satisfying cocoa hit. Finally, a crown of fluffy, golden-brown toasted marshmallow crème completes the experience, delivering that signature smoky-sweet char without a flame. The combination is utterly irresistible: sweet, slightly salty, creamy, and crunchy all in one bite. Get ready to impress everyone with this deceptively simple yet incredibly delicious dessert that captures the essence of summer fun, any time of year.
Ingredients
For the Graham Cracker Crust:
- 2 cups (about 14 full sheets) graham cracker crumbs
- 1/2 cup (1 stick) unsalted butter, melted
- 1/4 cup granulated sugar
- 1/4 teaspoon salt
For the Chocolate Layer:
- 1 1/2 cups (about 9 oz) semi-sweet chocolate chips or chopped chocolate
- 1/2 cup heavy cream
- 2 tablespoons unsalted butter
- 1 teaspoon vanilla extract
- Pinch of salt
For the Marshmallow Topping:
- 7 oz jar (about 1 1/2 cups) marshmallow crème (Fluff)
- Optional: Cooking torch for toasting
Step-by-Step Instructions
- Prepare the Crust: In a medium bowl, combine the graham cracker crumbs, melted butter, granulated sugar, and salt. Mix until thoroughly combined and the crumbs are evenly moistened.
- Press the Crust: Press the mixture firmly and evenly into the bottom of an 8×8-inch or 9×9-inch square baking pan lined with parchment paper, leaving an overhang on two sides to help with lifting later. Use the bottom of a glass or a flat spatula to ensure a compact crust. Place the pan in the refrigerator to chill while you prepare the chocolate layer.
- Make the Chocolate Layer: In a heatproof bowl, combine the chocolate chips, heavy cream, and butter. Heat gently over a double boiler or in the microwave in 30-second intervals, stirring well after each, until the chocolate is melted and smooth. Stir in the vanilla extract and a pinch of salt. The mixture should be glossy and pourable.
- Assemble the Bars (Chocolate Layer): Pour the warm chocolate mixture evenly over the chilled graham cracker crust. Gently spread it to the edges using an offset spatula or the back of a spoon. Return the pan to the refrigerator and chill for at least 1 hour, or until the chocolate layer is set and firm to the touch.
- Add Marshmallow Topping: Once the chocolate layer is firm, remove the pan from the refrigerator. Carefully spread the marshmallow crème evenly over the chocolate layer. For easier spreading, you can lightly oil your spatula or fingers.
- Chill Again: Return the pan to the refrigerator for another 30 minutes to allow the marshmallow crème to set slightly, making it easier to slice.
- Toast (Optional): If desired, use a kitchen torch to lightly toast the top of the marshmallow crème until golden brown in spots. Be careful not to burn it.
- Slice and Serve: Using the parchment paper overhang, lift the entire slab of bars out of the pan. Place on a cutting board and use a sharp, warm knife (run under hot water and wipe dry) to cut into 12-16 squares. Wipe the knife clean between cuts for neat slices. Serve immediately or store.
Pro Tips for Success
- Compact Crust is Key: When pressing the graham cracker crust, use the bottom of a flat-bottomed glass or a measuring cup to really pack it down. A firm crust prevents crumbling when slicing and ensures a sturdy base.
- Melt Chocolate Gently: Overheating chocolate can cause it to seize or become grainy. Use a double boiler or microwave in short bursts (30 seconds at a time), stirring thoroughly between each, until just melted and smooth.
- Warm Knife for Clean Slices: For perfectly neat bars, dip your knife in hot water and wipe it dry before each cut. This helps the knife glide through the chocolate and marshmallow without dragging or sticking, resulting in clean edges.
- Chill Thoroughly: Don’t rush the chilling steps. A well-chilled chocolate layer will be firm enough to support the marshmallow, and a slightly chilled marshmallow layer will be less sticky and easier to slice cleanly.
Variations & Substitutions
- Gluten-Free Option: Use gluten-free graham crackers. Ensure other ingredients are certified gluten-free.
- Dairy-Free/Vegan Option: Use dairy-free graham crackers, vegan butter, dairy-free chocolate chips, and a plant-based heavy cream alternative. For marshmallow, use vegan fluff or make your own with aquafaba.
- Nutty Twist: Add 1/2 cup finely chopped toasted pecans or walnuts to the graham cracker crust for extra crunch.
- Dark Chocolate Indulgence: For a richer bar, use dark chocolate chips (60-70% cocoa) instead of semi-sweet.
- Peanut Butter Swirl: Swirl 1/4 cup of melted creamy peanut butter into the chocolate layer before chilling.
Serving Suggestions
These No-Bake S’mores Bars are a fantastic stand-alone dessert, perfect for picnics, barbecues, potlucks, or as a simple weeknight treat. They’re especially delightful when served slightly chilled, allowing the layers to hold their structure while still offering a creamy texture. Pair them with a scoop of vanilla bean ice cream for an extra indulgent experience, or a hot cup of coffee or cocoa to balance the sweetness. Their make-ahead nature makes them ideal for entertaining.
Storage & Reheating
Store leftover No-Bake S’mores Bars in an airtight container in the refrigerator for up to 3-4 days. The marshmallow layer may lose some of its toasted crispness over time, but the flavors will remain delicious. Freezing is not recommended, as the marshmallow can become watery and alter the texture upon thawing. Serve chilled directly from the refrigerator.
Frequently Asked Questions
- Q: Can I make these bars ahead of time?
A: Yes, these bars are excellent for making ahead. Prepare them up to 1-2 days in advance and store in an airtight container in the refrigerator. Toast the marshmallow topping just before serving for the best finish. - Q: What if I don’t have a kitchen torch?
A: A kitchen torch is optional. The bars are delicious without toasting. For a similar effect, you can briefly place them under a broiler for 1-2 minutes, watching very closely to prevent burning. - Q: Why is my chocolate layer not setting?
A: Ensure you’re using good quality chocolate and heavy cream. The butter also aids setting. Most importantly, allow ample chilling time – at least 1 hour, or longer if your kitchen is warm.
Final Thoughts
These No-Bake S’mores Dessert Bars are more than just a treat; they’re a celebration of simplicity and classic flavors. With their irresistible layers of crunchy graham cracker, rich chocolate, and fluffy toasted marshmallow, they promise to bring smiles and satisfy cravings without any of the fuss. So skip the campfire, grab your ingredients, and whip up a batch of these delightful bars today – your taste buds will thank you!