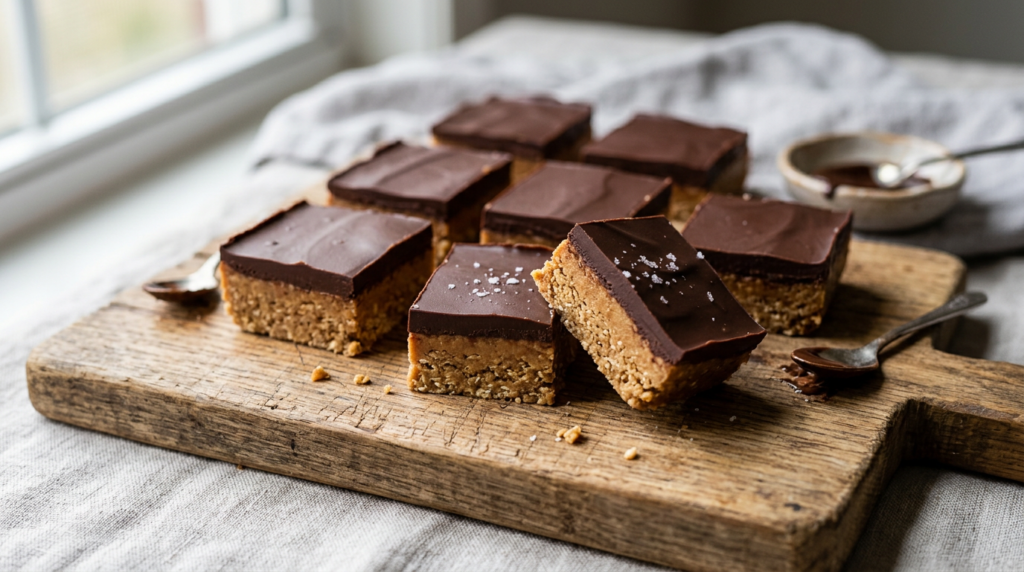
When a craving for something sweet hits, but the thought of turning on the oven feels like too much effort, these No-Bake Chocolate Peanut Butter Bars are your ultimate culinary hero. This recipe solves the universal problem of wanting a decadent dessert without the fuss, offering a truly effortless path to pure indulgence. Imagine a rich, dense, and slightly chewy peanut butter base, perfectly balanced with a smooth, glossy layer of chocolate ganache that sets firm but remains delightfully melt-in-your-mouth. Each bite delivers that iconic, beloved combination of salty peanut butter and sweet chocolate, a symphony of flavors and textures that’s both comforting and incredibly satisfying.
These bars are more than just easy; they’re a testament to how simple ingredients can create something truly extraordinary. They require minimal equipment, no baking skills, and come together in a flash, making them ideal for busy weeknights, last-minute potlucks, or simply when you need a quick pick-me-up. The texture is a dream: a firm yet yielding peanut butter layer that holds its shape, topped with a chocolate layer that snaps slightly before melting into a creamy bliss. The flavor is intensely chocolatey and deeply peanut buttery, a classic pairing that never disappoints. You’ll want to make these bars because they offer instant gratification, a guaranteed crowd-pleaser, and a delicious escape from the everyday, all without breaking a sweat in the kitchen.
Recipe Info
Prep Time: 20 minutes | Chill Time: 2 hours | Total Time: 2 hours 20 minutes | Yield: 16 bars
Ingredients
For the Peanut Butter Base:
- 1 ½ cups graham cracker crumbs (about 10-12 full graham cracker sheets)
- ½ cup unsalted butter, melted
- 1 cup creamy peanut butter (such as Jif or Skippy)
- 2 cups powdered sugar, sifted
- 1 teaspoon vanilla extract
For the Chocolate Topping:
- 1 ½ cups semi-sweet chocolate chips
- ½ cup creamy peanut butter
- 2 tablespoons unsalted butter
Step-by-Step Instructions
- Prepare the Pan: Line an 8×8-inch baking pan with parchment paper, leaving an overhang on two sides to easily lift the bars out later. This makes removal and cutting much simpler.
- Make the Peanut Butter Base: In a large mixing bowl, combine the graham cracker crumbs, melted butter, 1 cup creamy peanut butter, powdered sugar, and vanilla extract. Mix thoroughly with a sturdy spoon or your hands until all ingredients are well combined and a thick, crumbly dough forms. It should be moist enough to hold together when pressed.
- Press into Pan: Transfer the peanut butter mixture into the prepared 8×8-inch pan. Using the back of a spoon or your hands, press the mixture down firmly and evenly into the bottom of the pan. Ensure it’s packed tightly to create a solid base.
- Chill the Base: Place the pan in the refrigerator for at least 30 minutes while you prepare the chocolate topping. This helps the base firm up and prevents the chocolate from melting into it.
- Prepare the Chocolate Topping: In a microwave-safe bowl, combine the chocolate chips, ½ cup creamy peanut butter, and 2 tablespoons unsalted butter. Microwave in 30-second intervals, stirring well after each, until the mixture is completely melted and smooth. This usually takes 1-2 minutes total. Alternatively, you can melt the ingredients in a double boiler over simmering water, stirring until smooth.
- Pour Chocolate Over Base: Remove the chilled peanut butter base from the refrigerator. Pour the warm, melted chocolate mixture evenly over the peanut butter layer. Use an offset spatula or the back of a spoon to spread it smoothly to the edges.
- Chill to Set: Return the pan to the refrigerator and chill for at least 2 hours, or until the chocolate topping is completely set and firm to the touch. For best results, chill overnight.
- Cut and Serve: Once fully chilled, use the parchment paper overhang to lift the entire slab of bars out of the pan. Place it on a cutting board. Use a sharp knife, wiping it clean between cuts, to slice the bars into 16 squares. Enjoy immediately!
Pro Tips for Success
- Use Creamy Peanut Butter: For the best texture and consistency in both layers, opt for a creamy, shelf-stable peanut butter (like Jif or Skippy). Natural peanut butters, which often separate, can make the base too oily or the topping too thin.
- Sift Powdered Sugar: Sifting the powdered sugar before adding it to the peanut butter base prevents lumps and ensures a perfectly smooth, uniform texture in your bars.
- Pack the Base Firmly: When pressing the peanut butter mixture into the pan, really lean into it! A well-compacted base will hold its shape better and prevent crumbling when you cut the bars.
- Clean Knife for Cutting: To achieve clean, sharp slices, warm your knife under hot water, wipe it dry, and then make each cut. Repeat this process for every few cuts to prevent the chocolate from cracking or dragging.
Variations & Substitutions
- Gluten-Free Option: Simply use gluten-free graham cracker crumbs. Most major brands offer a certified gluten-free alternative that works perfectly in this recipe.
- Dairy-Free/Vegan Option: Replace the unsalted butter with a high-quality dairy-free butter alternative (stick form works best). Ensure your chocolate chips are dairy-free (many dark chocolate chips are).
- Ingredient Swaps: Experiment with different types of chocolate chips for the topping – milk chocolate for a sweeter bar, or dark chocolate for a richer, less sweet profile. You can also sprinkle a pinch of sea salt flakes over the chocolate topping before it sets for a delightful salty-sweet contrast.
- Higher-Protein Option: While not a direct substitute for peanut butter, you could explore adding a scoop of unflavored or vanilla protein powder to the peanut butter base mixture. You may need to add a touch more melted butter or a splash of plant-based milk to maintain the desired consistency.
Serving Suggestions
These No-Bake Chocolate Peanut Butter Bars are a fantastic standalone treat, perfect for satisfying a sweet tooth any time of day. They’re excellent with a glass of cold milk, a cup of coffee, or even alongside a scoop of vanilla bean ice cream for an extra decadent dessert experience. They make a wonderful addition to potlucks, bake sales, or holiday platters, and are always a hit at kids’ parties. Best enjoyed chilled, straight from the refrigerator.
Storage & Reheating
Fridge Storage: Store leftover No-Bake Chocolate Peanut Butter Bars in an airtight container in the refrigerator for up to 1 week. Keeping them chilled maintains their firm texture and prevents the chocolate from becoming too soft.
Freezer Storage: These bars freeze beautifully! Once fully set, cut them into individual squares. Place them in a single layer on a baking sheet and freeze until solid (about 1-2 hours). Then, transfer the frozen bars to an airtight freezer-safe container or bag, separating layers with parchment paper to prevent sticking. They can be stored in the freezer for up to 3 months. Thaw in the refrigerator for a few hours or at room temperature for about 30 minutes before serving.
Reheating: No reheating needed! These bars are best enjoyed cold or at cool room temperature.
Frequently Asked Questions
Can I use natural peanut butter for this recipe?
It’s generally recommended to use creamy, shelf-stable peanut butter (like Jif or Skippy) for this recipe. Natural peanut butters, especially those that require stirring, can be too oily or have an inconsistent texture, which might make the base too greasy or crumbly, and the topping too thin.
Why did my chocolate topping crack when I cut the bars?
Chocolate cracking often happens if the bars are too cold or if the knife isn’t warm enough. Ensure your bars have sat at room temperature for 5-10 minutes before cutting, and use a sharp knife that has been warmed under hot water and wiped dry between cuts. This helps create clean, smooth slices.
Can I make these bars ahead of time for a party?
Absolutely! These No-Bake Chocolate Peanut Butter Bars are an ideal make-ahead dessert. You can prepare them up to 3-4 days in advance and store them in an airtight container in the refrigerator. They taste just as good, if not better, after a day or two as the flavors meld.
Final Thoughts
These No-Bake Chocolate Peanut Butter Bars are more than just a recipe; they’re a promise of effortless joy and undeniable deliciousness. With their rich, creamy layers and classic flavor combination, they’re guaranteed to become a cherished go-to in your dessert repertoire. So go ahead, whip up a batch, and treat yourself to a moment of pure, unadulterated bliss. Your taste buds will thank you!