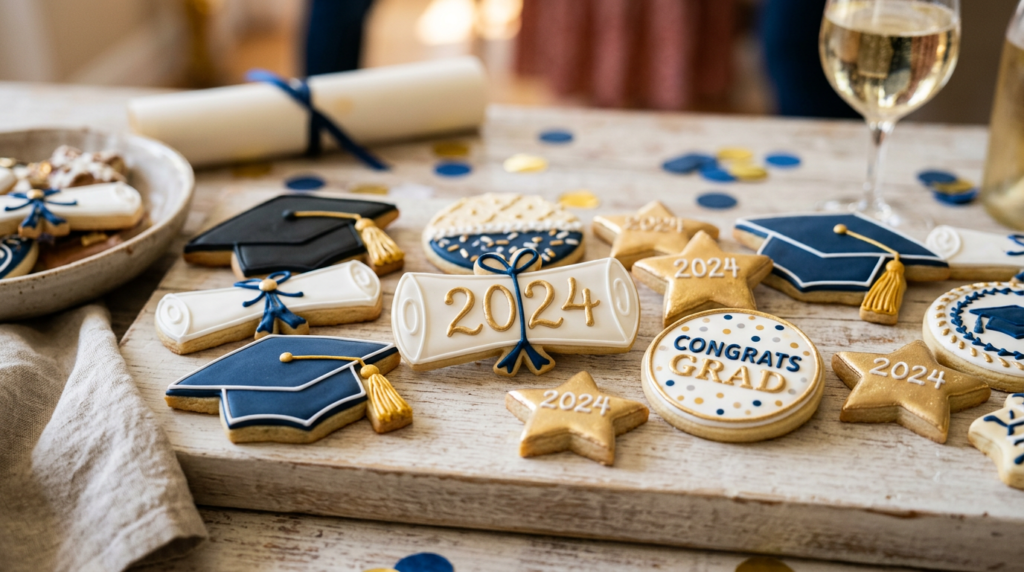
Mark a momentous occasion with a batch of delightful Easy Decorated Graduation Sugar Cookies. These aren’t just any cookies; they’re edible celebrations, crafted to bring smiles and a touch of personalized sweetness to any graduation gathering. Imagine crisp edges giving way to a soft, buttery center, all enrobed in a smooth, subtly sweet royal icing that’s just waiting for your creative touch. This recipe is designed to simplify the process of making stunning, bakery-worthy cookies right in your own kitchen, even if you’re new to cookie decorating.
Graduation season is a time for pride, joy, and a little bit of indulgence. While store-bought treats are convenient, there’s something incredibly special and heartfelt about homemade cookies. They offer a personal touch that shows you truly care, making them perfect for graduation parties, thoughtful gifts for the grad, or a sweet centerpiece for your celebration table. Our sugar cookie base is reliably delicious – rich, tender, and holds its shape beautifully during baking, providing the perfect canvas for your decorating artistry. The royal icing recipe is forgiving and versatile, allowing you to achieve both crisp outlines and smooth fills with ease. Get ready to create memorable treats that taste as good as they look, making every bite a sweet tribute to hard-earned success!
Recipe Info
- Prep Time: 45 minutes
- Chill Time: 2 hours
- Cook Time: 8-10 minutes per batch
- Decorating Time: 1-2 hours (depending on detail)
- Total Time: Approximately 4-5 hours
- Yield: 2-3 dozen cookies (depending on cutter size)
Ingredients
For the Sugar Cookies:
- 3 cups (360g) all-purpose flour, plus more for dusting
- 1 teaspoon baking powder
- 1/2 teaspoon salt
- 1 cup (226g) unsalted butter, softened
- 1 1/2 cups (300g) granulated sugar
- 1 large egg
- 2 teaspoons vanilla extract
- 1/2 teaspoon almond extract (optional, but highly recommended)
For the Royal Icing:
- 4 cups (480g) powdered sugar, sifted
- 3 tablespoons meringue powder
- 1/2 cup (120ml) warm water, plus more as needed
- 1 teaspoon vanilla extract (clear if you want pure white icing)
- Gel food coloring (black, white, gold, school colors, etc.)
Step-by-Step Instructions
- Combine Dry Ingredients: In a medium bowl, whisk together the flour, baking powder, and salt. Set aside.
- Cream Butter and Sugar: In a large bowl with an electric mixer (stand or hand-held), cream the softened butter and granulated sugar together on medium speed until light and fluffy, about 3-4 minutes.
- Add Wet Ingredients: Beat in the egg, vanilla extract, and almond extract (if using) until just combined. Scrape down the sides of the bowl as needed.
- Combine Wet and Dry: Gradually add the dry ingredient mixture to the wet ingredients, mixing on low speed until just combined. Be careful not to overmix. The dough will be soft.
- Chill the Dough: Divide the dough in half, flatten each half into a disk, wrap tightly in plastic wrap, and refrigerate for at least 2 hours, or up to 2 days. Chilling is crucial for preventing spread and making the dough easier to handle.
- Preheat Oven & Prep Baking Sheets: Once dough is chilled, preheat your oven to 375°F (190°C). Line baking sheets with parchment paper or silicone baking mats.
- Roll and Cut Cookies: On a lightly floured surface, roll out one disk of chilled dough to about 1/4-inch thickness. Use graduation-themed cookie cutters (caps, diplomas, stars, numbers) to cut out shapes. Carefully transfer the cut cookies to the prepared baking sheets, leaving about 1 inch between them. Gather dough scraps, gently re-roll, and cut more cookies until all dough is used.
- Bake: Bake for 8-10 minutes, or until the edges are lightly golden and the centers are set. Baking time will vary depending on the size and thickness of your cookies.
- Cool: Let the cookies cool on the baking sheets for 5 minutes before transferring them to a wire rack to cool completely. Cookies must be completely cool before decorating.
- Prepare Royal Icing: In a large bowl, whisk together the sifted powdered sugar and meringue powder. Add the warm water and vanilla extract. Beat on low speed with an electric mixer until combined, then increase to high speed and beat for 5-7 minutes, until the icing is thick, glossy, and holds stiff peaks.
- Adjust Icing Consistency: Divide the icing into separate bowls for different colors. For outlining, the icing should be thick enough to hold its shape. For flooding (filling in), add a few drops of water at a time and stir until the icing smooths out within 10-15 seconds after a spoon is dragged through it.
- Color and Decorate: Tint icing with gel food coloring. Transfer icing to piping bags fitted with small round tips (e.g., PME #1.5 or #2) or use tipless bags. Outline your cookies first, let dry for 10-15 minutes, then flood the centers. Allow flooded cookies to dry completely (several hours or overnight) before adding additional details or stacking.
Pro Tips for Success
- Don’t Skip the Chill Time: Chilling the dough is paramount. It solidifies the butter, preventing the cookies from spreading excessively in the oven and helping them maintain their crisp, defined edges, which are ideal for decorating.
- Achieve Perfect Icing Consistency: Royal icing is all about consistency. For outlining, aim for a toothpaste-like thickness. For flooding, it should be like honey or shampoo – thin enough to spread but not so thin it runs off the cookie. Test on a spare cookie or parchment paper.
- Work in Batches for Icing: If you’re using multiple colors or consistencies, keep unused icing covered tightly with plastic wrap directly on the surface to prevent it from drying out and forming a crust.
- Patience is Key for Drying: Allow each layer of royal icing to dry completely before adding new details or colors on top. This prevents colors from bleeding and ensures a smooth, professional finish. For best results, let flooded cookies dry overnight.
Variations & Substitutions
- Gluten-Free Option: Substitute the all-purpose flour with a 1:1 gluten-free baking flour blend that contains xanthan gum. The texture may be slightly different but will still be delicious.
- Dairy-Free Option: Use a high-quality plant-based butter substitute (stick form, not spread) in place of unsalted butter. Ensure your granulated sugar is vegan-friendly (some are processed with bone char).
- Flavor Swaps: Experiment with different extracts! Lemon zest in the dough or a touch of lemon extract can add a bright, citrusy note. Peppermint or orange extract can also be fun for other occasions.
- Simpler Icing: If royal icing feels too daunting, you can use a simple glaze icing (powdered sugar, milk, and vanilla extract) for a quicker, less detailed decoration. It won’t harden as much as royal icing but is still tasty.
- Nut-Free: Omit the almond extract if there are nut allergies. The cookies will still be flavorful with just vanilla.
Serving Suggestions
These Easy Decorated Graduation Sugar Cookies are perfect for any graduation celebration! Arrange them on a festive platter as a centerpiece for a dessert table, or individually wrap them in clear bags with a ribbon for thoughtful party favors. They also make a wonderful gift for the graduate, teachers, or anyone who helped them along their journey. Enjoy them with a glass of milk, coffee, or alongside other celebratory treats.
Storage & Reheating
- Room Temperature: Once the royal icing is completely dry, store decorated cookies in an airtight container at room temperature for up to 1 week. Layer them carefully with parchment paper to prevent sticking or damage to the icing.
- Freezer (Baked Cookies): Baked, undecorated cookies can be frozen for up to 3 months. Wrap them tightly in plastic wrap, then place them in an airtight freezer-safe container or bag. Thaw at room temperature before decorating.
- Freezer (Dough): Unbaked cookie dough can be wrapped tightly and frozen for up to 3 months. Thaw in the refrigerator overnight before rolling and baking.
- Freezer (Decorated Cookies): While possible, freezing decorated cookies can sometimes cause colors to bleed or icing to crack. If you must freeze them, ensure the icing is completely dry, then layer carefully in an airtight container with parchment paper. Thaw slowly in the refrigerator, then at room temperature.
Frequently Asked Questions
Can I make the cookie dough ahead of time?
Absolutely! The cookie dough can be made up to 2 days in advance and stored tightly wrapped in the refrigerator. This is a great way to break up the baking process and make graduation day less stressful.
My royal icing is too thick/thin. How do I fix it?
If your royal icing is too thick, add water a few drops at a time, stirring well after each addition, until you reach the desired consistency. If it’s too thin, add more sifted powdered sugar, a tablespoon at a time, until it thickens up. Always adjust gradually!
How do I prevent my sugar cookies from spreading too much?
Several factors help prevent spreading: ensure your butter isn’t too soft (just softened, not melted), chill your dough thoroughly for at least 2 hours, and don’t overmix the dough once flour is added. Also, make sure your oven temperature is accurate.
Final Thoughts
Creating these Easy Decorated Graduation Sugar Cookies is more than just baking; it’s a joyful way to honor a significant milestone. The process, from mixing the buttery dough to adding the final celebratory details with vibrant icing, is incredibly rewarding. Each cookie becomes a tiny, delicious canvas for your creativity, resulting in a batch of treats that are as memorable as the occasion itself. So gather your ingredients, unleash your inner artist, and bake up some sweet success to cheer on your favorite graduate!