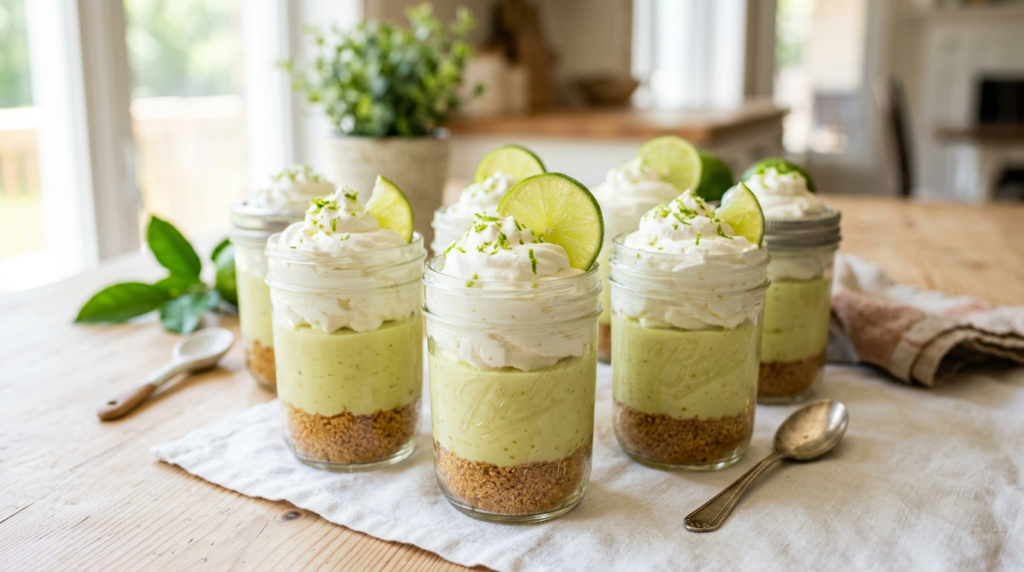
Imagine the bright, zesty flavor of classic Key Lime Pie, but in a perfectly portioned, portable, and utterly irresistible jar. This Tangy No-Bake Key Lime Pie in a Jar recipe delivers all the iconic taste you love without ever needing to turn on your oven. It’s the ultimate solution for satisfying your sweet tooth with minimal effort and maximum deliciousness. Whether you’re hosting a backyard barbecue, packing a picnic, or simply craving a refreshing treat on a warm day, these individual desserts are an absolute game-changer.
The beauty of this recipe lies in its simplicity and convenience. Traditional Key Lime Pie, while undeniably delicious, can sometimes feel like a project. This no-bake version eliminates the fuss of crust blind-baking and oven-watching, making it accessible for even the most novice home cooks. Each jar features a buttery, crunchy graham cracker crust, a lusciously creamy and intensely tangy Key lime filling, and a cloud of fluffy whipped cream on top. The contrast of textures – the crumbly crust against the silky smooth filling and light topping – creates a truly delightful experience with every spoonful.
What makes this dessert truly special is its vibrant flavor profile. The Key lime filling is a perfect balance of sweet and tart, with that unmistakable citrus zing that awakens your palate. It’s incredibly refreshing, light, and utterly satisfying without being overly heavy. Plus, serving them in jars means no messy slicing, no plates needed, and easy transport. They look charmingly rustic and elegant all at once, making them a fantastic option for entertaining or simply treating yourself to a little slice of sunshine. Get ready to impress with this effortlessly chic and incredibly tasty dessert!
Recipe Info
- Prep Time: 25 minutes
- Cook Time: 0 minutes
- Chill Time: 2-4 hours
- Total Time: 25 minutes + chilling
- Yield: 6 servings (in 8oz jars)
Ingredients
For the Graham Cracker Crust:
- 1 ½ cups (about 10-12 full sheets) graham cracker crumbs
- ¼ cup granulated sugar
- 6 tablespoons unsalted butter, melted
For the Key Lime Filling:
- 1 (14-ounce) can sweetened condensed milk
- ½ cup fresh or bottled Key lime juice (about 8-10 Key limes)
- 1 teaspoon Key lime zest (from about 2-3 Key limes)
- 1 cup heavy cream, cold
- ¼ cup powdered sugar
- ½ teaspoon vanilla extract
For the Topping & Garnish:
- 1 cup heavy cream, cold
- 2 tablespoons powdered sugar
- ½ teaspoon vanilla extract
- Thin slices of Key lime or extra lime zest, for garnish (optional)
Step-by-Step Instructions
- Prepare Jars: Gather six 8-ounce mason jars or similar individual serving glasses. Ensure they are clean and dry.
- Make the Crust: In a medium bowl, combine the graham cracker crumbs, granulated sugar, and melted butter. Stir until the crumbs are evenly moistened. Divide the mixture evenly among the prepared jars, pressing it firmly into the bottom of each jar using the back of a spoon or a small tamper. Place the jars in the refrigerator to chill while you prepare the filling.
- Prepare Key Lime Base: In a large bowl, whisk together the sweetened condensed milk, Key lime juice, and Key lime zest until well combined and slightly thickened. The acidity of the lime juice will react with the condensed milk, causing it to thicken. Set aside.
- Whip Cream for Filling: In a separate large, chilled bowl, combine 1 cup of cold heavy cream, ¼ cup powdered sugar, and ½ teaspoon vanilla extract. Beat with an electric mixer on medium-high speed until stiff peaks form. Be careful not to overbeat, as it can turn grainy.
- Fold in Whipped Cream: Gently fold about one-third of the whipped cream into the Key lime mixture to lighten it. Then, carefully fold in the remaining whipped cream until no streaks remain and the mixture is light and airy.
- Assemble the Jars: Spoon or pipe the Key lime filling evenly over the chilled graham cracker crusts in each jar. Smooth the tops gently with a spoon.
- Chill Thoroughly: Cover the jars loosely with lids or plastic wrap and refrigerate for at least 2-4 hours, or preferably overnight, to allow the filling to set completely and the flavors to meld.
- Prepare Topping & Serve: Just before serving, prepare the whipped cream topping. In a clean, chilled bowl, combine 1 cup of cold heavy cream, 2 tablespoons powdered sugar, and ½ teaspoon vanilla extract. Beat with an electric mixer until stiff peaks form. Spoon or pipe the whipped cream topping onto each Key lime pie jar. Garnish with a thin slice of Key lime or a sprinkle of fresh lime zest, if desired. Serve immediately and enjoy!
Pro Tips for Success
- Use Fresh Key Lime Juice: While bottled Key lime juice works in a pinch, fresh Key lime juice offers a more vibrant, authentic, and complex tartness that truly elevates the flavor of this pie.
- Chill Bowls and Cream: For the best whipped cream, ensure your mixing bowl and beaters are well-chilled before whipping the heavy cream. This helps the cream whip up faster and achieve stiffer peaks.
- Don’t Overmix the Filling: Once you fold the whipped cream into the Key lime base, mix just until combined. Overmixing can deflate the whipped cream, resulting in a less airy and creamy filling.
- Ensure Adequate Chilling Time: The chilling time is crucial for the filling to set properly. Resist the urge to serve too early; a well-chilled pie will have the perfect firm-yet-creamy texture.
Variations & Substitutions
- Gluten-Free Option: Easily make this recipe gluten-free by using gluten-free graham crackers for the crust.
- Dairy-Free/Vegan Option: Replace the sweetened condensed milk with a vegan sweetened condensed coconut milk. For the whipped cream, use full-fat canned coconut cream (chilled overnight, scoop out the thick cream) or a store-bought vegan whipped topping. Use vegan butter for the crust.
- Lighter Version: Use a light or fat-free sweetened condensed milk. You can also reduce the amount of whipped cream in the filling or skip the final whipped cream topping altogether for a slightly lighter dessert.
- Crust Swaps: Experiment with different cookie crumbs for the crust. Vanilla wafers, shortbread cookies, or even gingersnaps could offer interesting flavor variations.
- Lemon Twist: If Key limes are hard to find, you can substitute with fresh lemon juice and lemon zest for a delicious no-bake lemon pie in a jar.
Serving Suggestions
These individual Tangy No-Bake Key Lime Pies in a Jar are incredibly versatile and perfect for almost any occasion. They shine as a refreshing dessert at summer barbecues, potlucks, or picnics, as their individual portions make serving a breeze. They’re also fantastic for dinner parties, offering an elegant yet fuss-free end to a meal. Serve them straight from the fridge, perhaps with a small spoon, and let the vibrant flavors speak for themselves. A sprig of fresh mint or a few fresh berries could add an extra touch of color and freshness.
Storage & Reheating
- Refrigerator: Store the assembled Key Lime Pie jars, covered, in the refrigerator for up to 3-4 days. For best results, add the final whipped cream topping just before serving.
- Freezer: Freezing is not recommended for this recipe. The texture of the whipped cream and the crust can become undesirable after thawing.
- Reheating: This is a no-bake, chilled dessert, so reheating is not applicable. Always serve cold.
Frequently Asked Questions
Q: Can I use regular lime juice instead of Key lime juice?
A: Yes, you can use regular lime juice (Persian limes) if Key limes are unavailable. However, Key limes have a distinct aromatic, slightly more tart, and less acidic flavor profile that is characteristic of traditional Key Lime Pie. Regular lime juice will still yield a delicious pie, but the flavor will be slightly different.
Q: How far in advance can I make these Key Lime Pie jars?
A: You can prepare the Key lime pie jars (crust and filling) up to 2 days in advance. Store them covered in the refrigerator. It’s best to add the fresh whipped cream topping and any garnishes just before serving to ensure the topping is light and fluffy.
Q: Why is my Key lime filling not setting properly?
A: The acidity of the lime juice reacts with the proteins in the sweetened condensed milk to thicken the filling. Ensure you are using the correct amount of lime juice and that the mixture is thoroughly chilled for at least 2-4 hours, or preferably overnight. If it’s still too soft, it might need more chilling time or a slightly higher ratio of lime juice to condensed milk (though stick to the recipe first).
Final Thoughts
There’s something truly magical about a dessert that tastes incredibly gourmet yet is so simple to prepare. These Tangy No-Bake Key Lime Pies in a Jar are a testament to that magic. With their bright, refreshing flavor, creamy texture, and charming presentation, they’re destined to become a go-to recipe in your repertoire. So, grab your jars, whisk up some sunshine, and treat yourself and your loved ones to this delightful, fuss-free dessert. Happy no-baking!